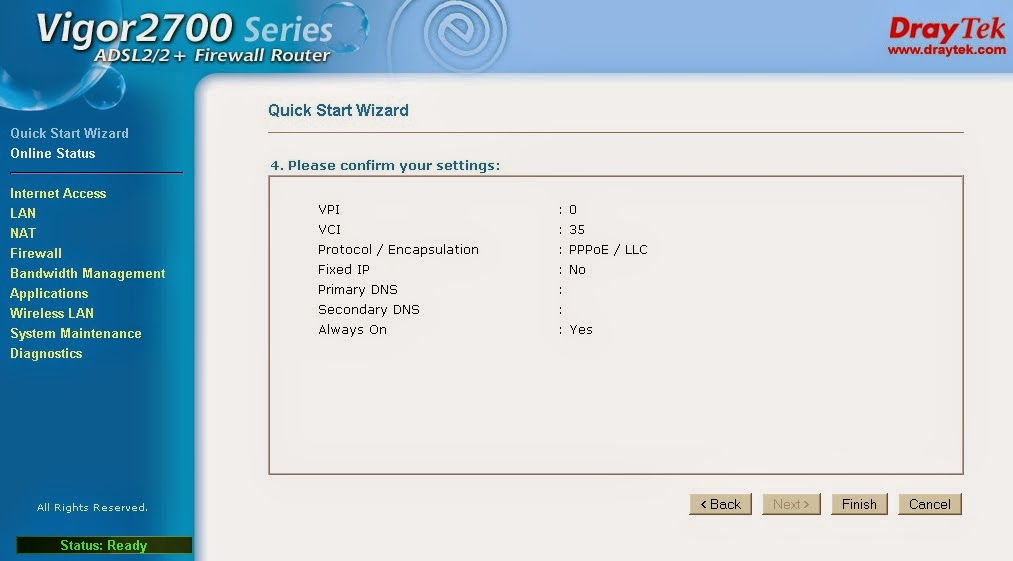
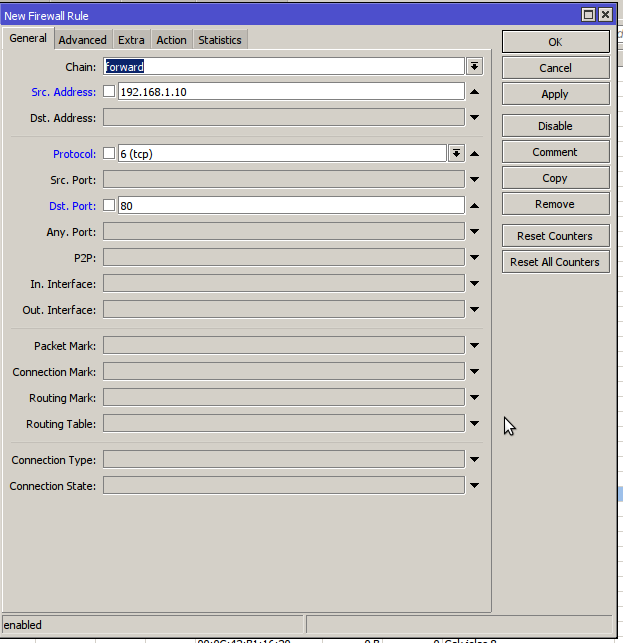
Konfigurasi Draytek Vigor 2700 yang terpenting adalah seperti gambar di bawah ini :
1. Setting tahap 1
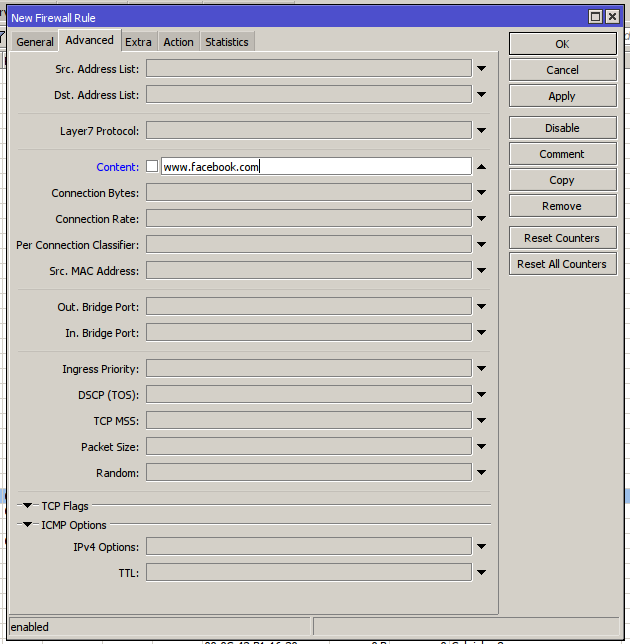
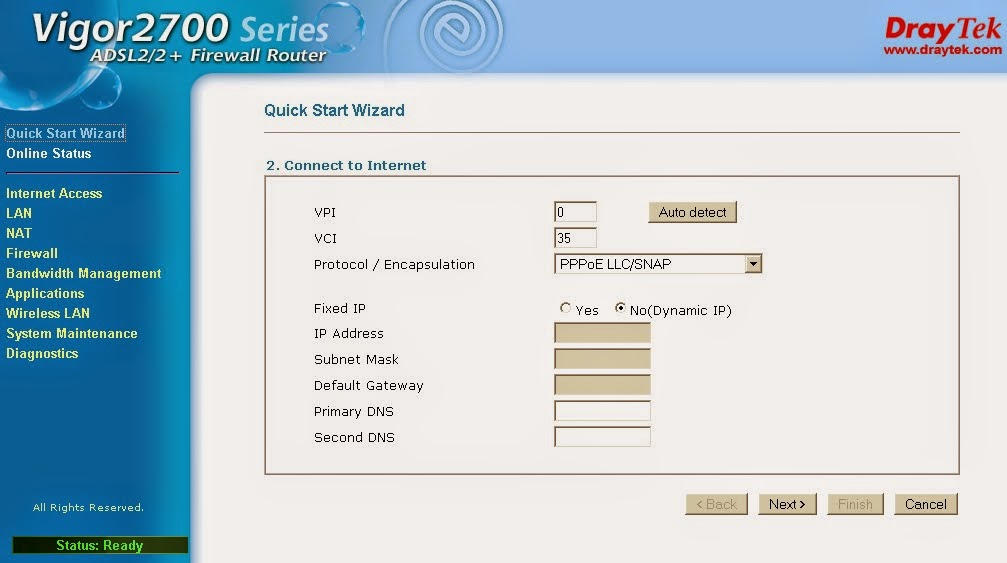 2. Setting Tahap 2
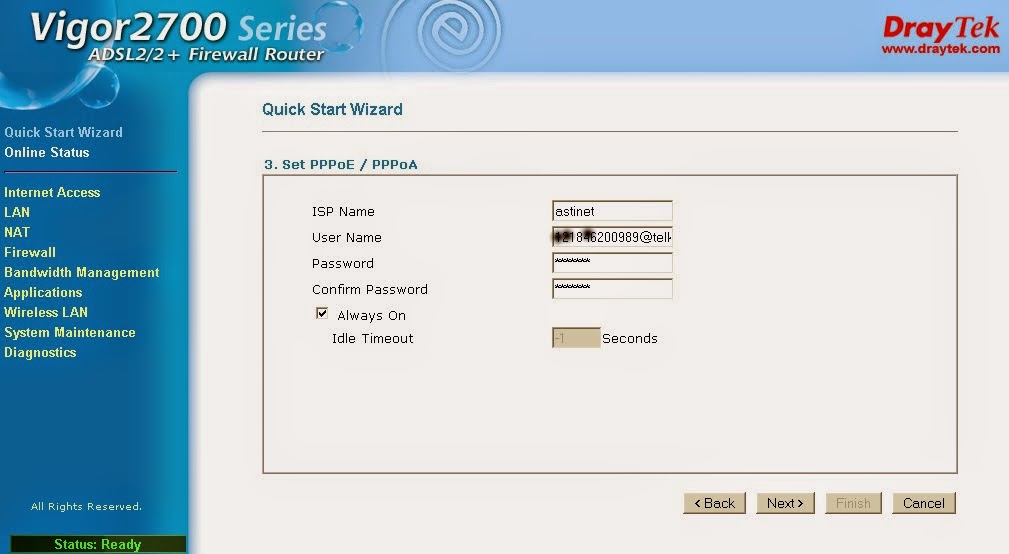 3. Setting Tahap 3
1. Setting tahap 1


 4.
Pada windows store juga beberapa aplikasi telah di kelompokkan beberapa
kategori seperti games, sosial, music & video, dll.
4.
Pada windows store juga beberapa aplikasi telah di kelompokkan beberapa
kategori seperti games, sosial, music & video, dll. 


sc delete ServiceNameIf your service name has spaces in it, you’ll need to wrap the service name in quotes, like this:
sc delete “Adobe LM Service”


| Server type | Server hostname | Port | SSL | Authentication |
| Incoming: POP3 | pop.mail.yahoo.com | 995 | SSL/TLS | Normal Password |
| Outgoing: SMTP | smtp.mail.yahoo.com | 465 | SSL/TLS | Normal Password |


